

How to clean a diaphragm in a diaphragm electrolyzer?
Dec 30, 2025
Hey there! As a supplier of Diaphragm Electrolyzers, I often get asked about how to clean the diaphragm in these bad boys. It's a crucial part of maintenance, so I thought I'd share my knowledge and some tips on the best way to handle it.
First off, let's talk about why cleaning the diaphragm in a diaphragm electrolyzer is so important. The diaphragm plays a vital role in separating the anode and cathode compartments of the electrolyzer. It allows for the passage of certain ions while preventing the mixing of the anode and cathode products. Over time, though, the diaphragm can get clogged with all sorts of stuff, like scale, sediment, and other impurities. This can reduce its efficiency and even cause some serious operational problems. A dirty diaphragm can lead to increased energy consumption, lower production rates of the desired electrolysis products, and in some cases, it can even damage the electrolyzer itself. So, keeping that diaphragm clean is not just a good idea ; it's a must - do!
Now, before you start cleaning, you've got to gather the right tools and materials. You'll need a cleaning solution that's compatible with the diaphragm material. Most diaphragms are made from materials like asbestos - free polymers or other specialized fabrics. For these types of diaphragms, a mild acid or alkaline solution can work well. You can usually find these cleaning solutions specifically designed for diaphragm electrolyzers at your local chemical supply store or order them online.

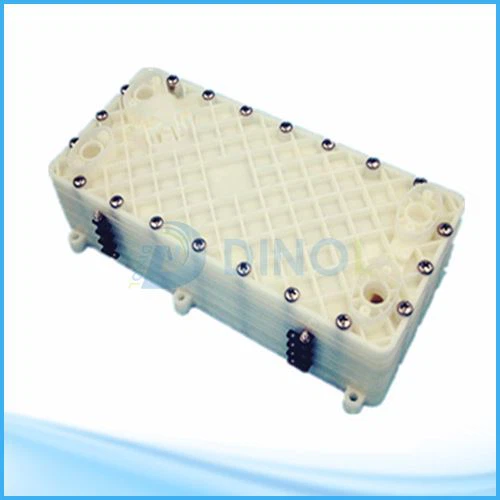
You'll also need some safety gear, like gloves and goggles. Cleaning chemicals can be harsh, and you don't want to get them on your skin or in your eyes. A brush or sponge for scrubbing, and a container large enough to soak the diaphragm in are also essential. Oh, and don't forget a rinse container filled with clean, deionized water.
The first step in the cleaning process is to shut down the electrolyzer properly. Make sure to follow the manufacturer's instructions for this. You'll want to disconnect the power supply, release any pressure in the system, and drain the electrolyte solution from the electrolyzer. This might take a little time, but it's super important for your safety.
Once the electrolyzer is shut down and drained, carefully remove the diaphragm. This can be a bit tricky, depending on the design of your electrolyzer. Some diaphragms are held in place with clips or bolts, while others might be sealed in. Just take your time and be gentle. You don't want to tear or damage the diaphragm while you're removing it.
After you've successfully removed the diaphragm, it's time to soak it in the cleaning solution. Fill your container with the appropriate cleaning solution and gently place the diaphragm in it. Make sure the diaphragm is fully submerged. The soaking time can vary depending on how dirty the diaphragm is, but usually, a few hours to overnight is a good place to start.
While the diaphragm is soaking, you can give the rest of the electrolyzer a bit of a clean as well. Wipe down the anode and cathode chambers, remove any visible debris, and check the seals for any signs of wear or damage.
Once the soaking time is up, take the diaphragm out of the cleaning solution. You'll probably notice that some of the dirt and impurities have already started to come off. Now, it's time to use your brush or sponge to gently scrub the diaphragm. Be careful not to scrub too hard because you don't want to damage the diaphragm's structure. Scrub all over, paying special attention to any areas that still look dirty.
After you've given the diaphragm a good scrub, rinse it thoroughly in the container filled with deionized water. This helps to remove any remaining cleaning solution and loosened debris. You might need to change the rinse water a few times to make sure the diaphragm is completely clean.
Once you're satisfied that the diaphragm is clean, it's time to put it back in the electrolyzer. Make sure to align it correctly, and follow the manufacturer's instructions for reinstalling it. Double - check all the connections and seals to ensure everything is secure.
Now, before you start up the electrolyzer again, you'll want to refill it with the appropriate electrolyte solution. Make sure to follow the correct procedures for this, too. And then, finally, you can turn the power back on and start running your electrolyzer again.
If you want to learn more about different types of electrolyzers, check out these links: Acid Base Ion Water Diaphragm Electrolyzer, Ionic Exchange Membrane Cell, and Diaphragm Electrolyzer. These pages offer a wealth of information on various electrolyzer technologies.
As a Diaphragm Electrolyzer supplier, I'm always here to provide more advice on proper maintenance and to help you choose the right electrolyzer for your needs. If you're in the market for a new diaphragm electrolyzer or have any questions about the ones you already have, don't hesitate to reach out and start a chat about procurement. I'm confident we can find the perfect solution for you.
References
- General knowledge from years of experience in the diaphragm electrolyzer industry.
- Manufacturer's manuals for various diaphragm electrolyzer models.